5 Low Cost Construction Techniques to Build More Efficient Homes

Woman analyzing home efficiency and heat map of home

A few tubes of caulk, cans of foam, and a bucket of mastic can go a long way.” — Famous quote by the one and only, Taylor Fearrington

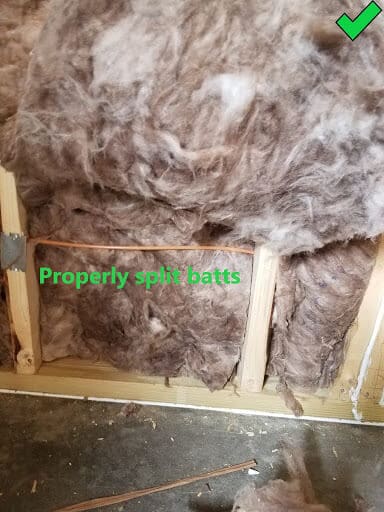
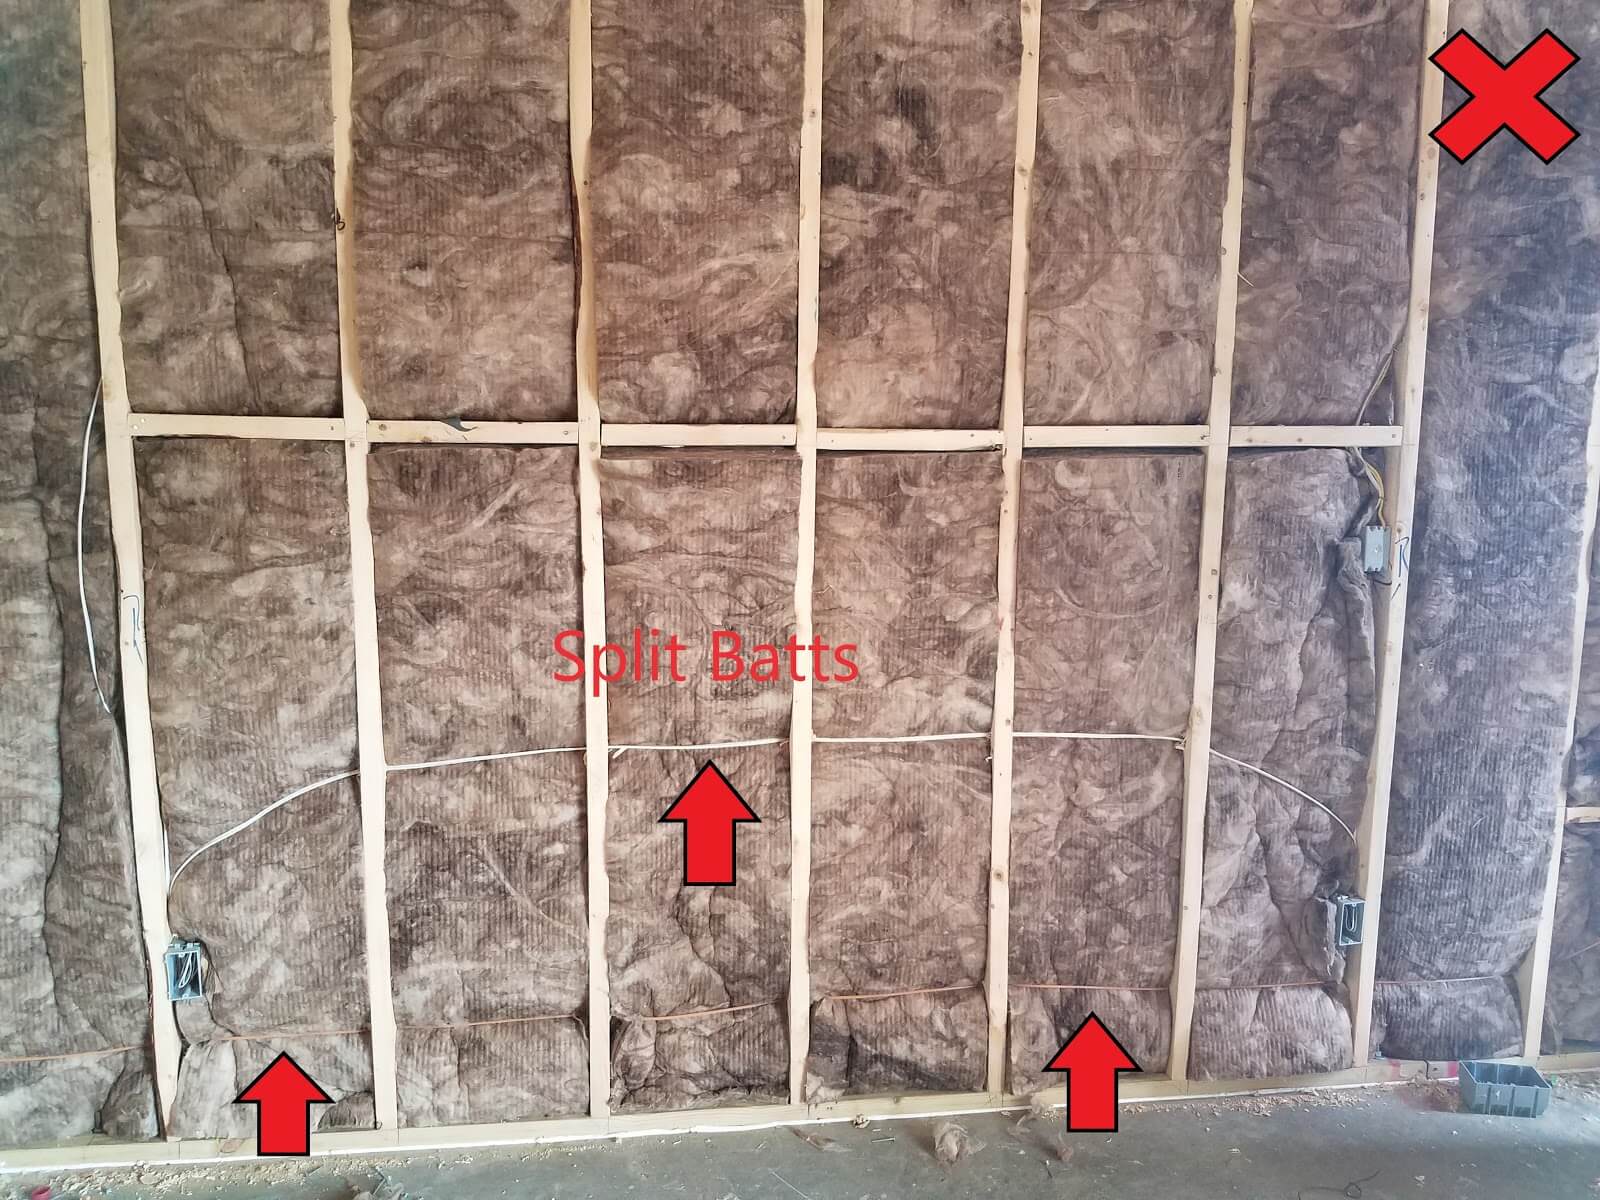
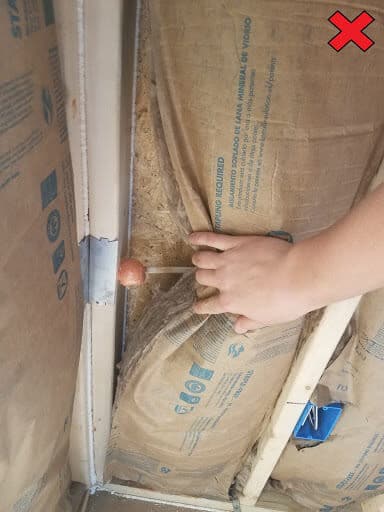
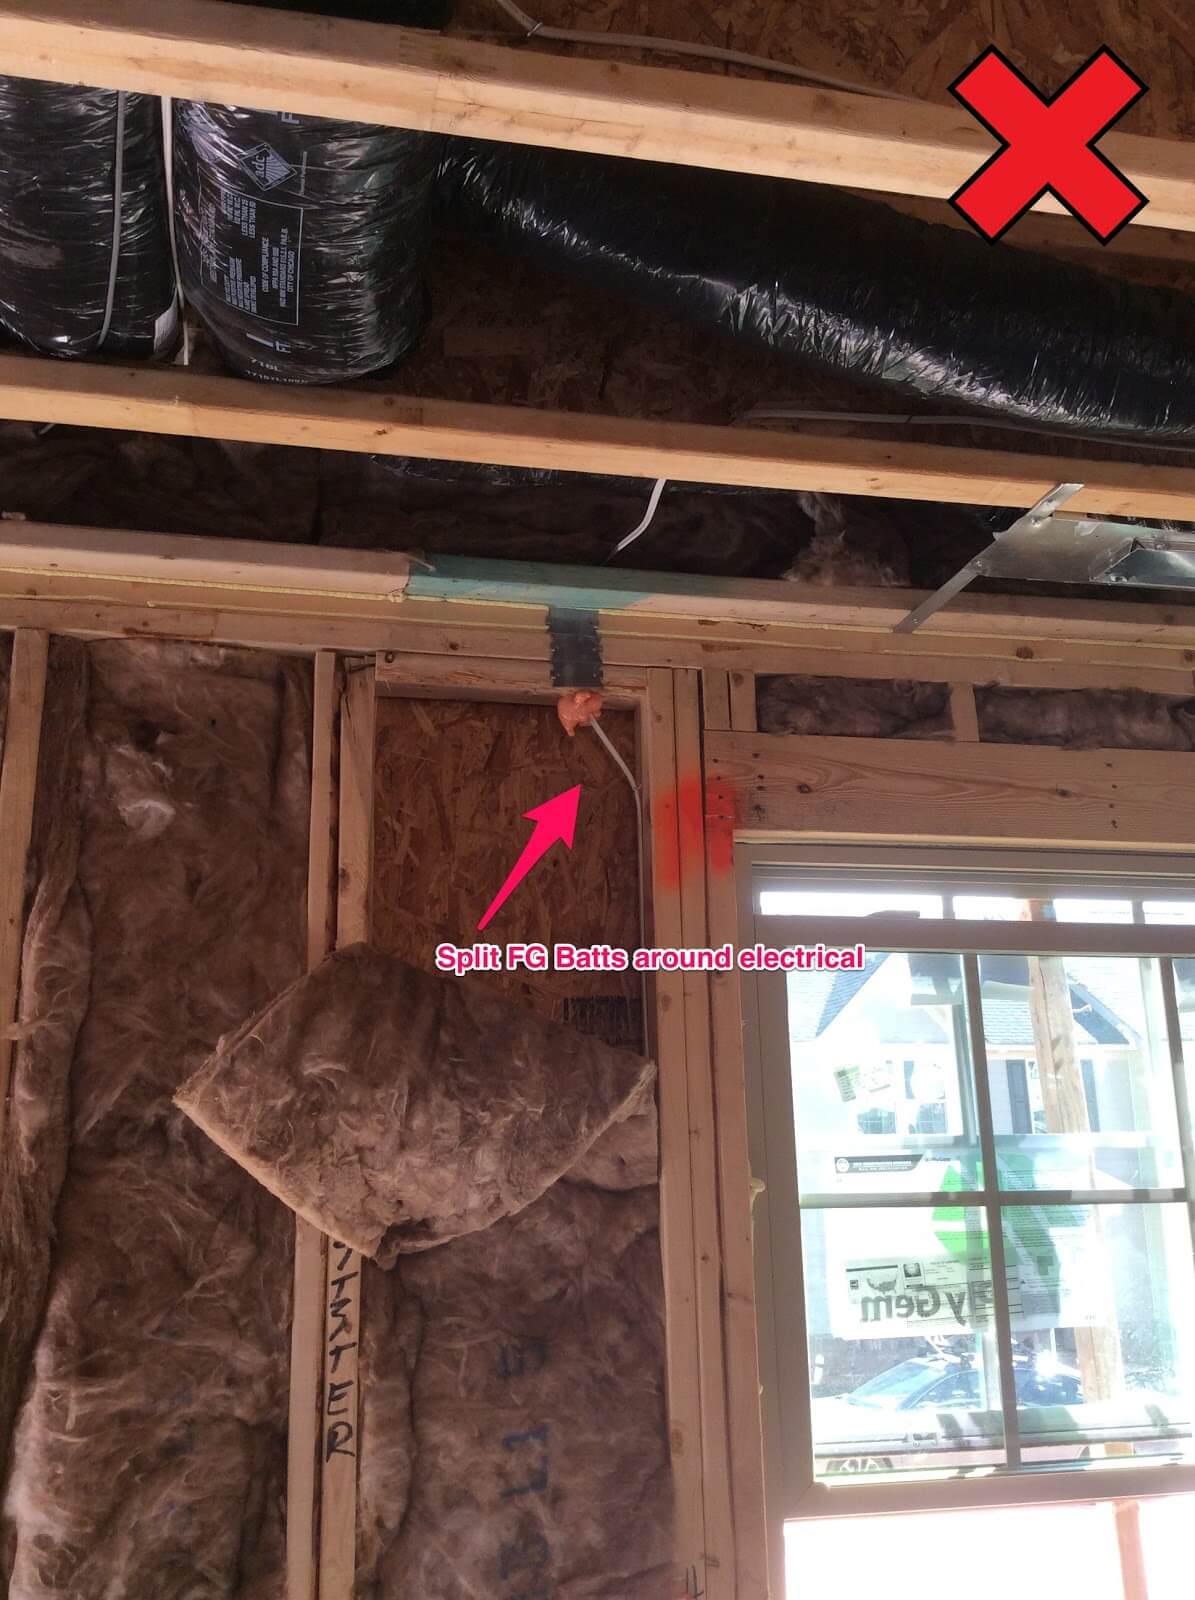
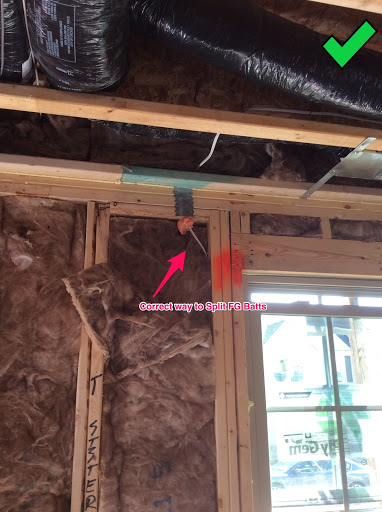
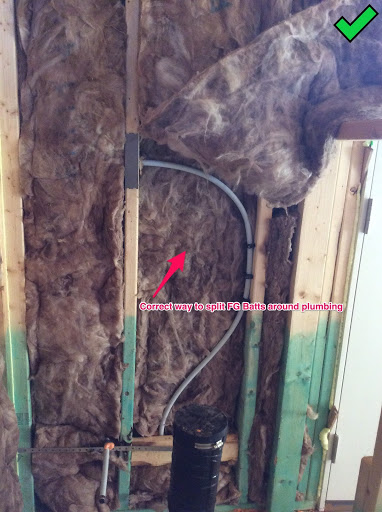
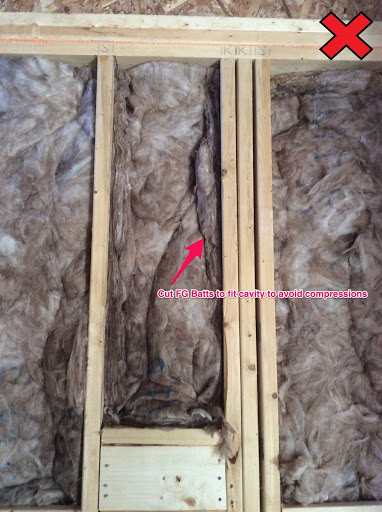
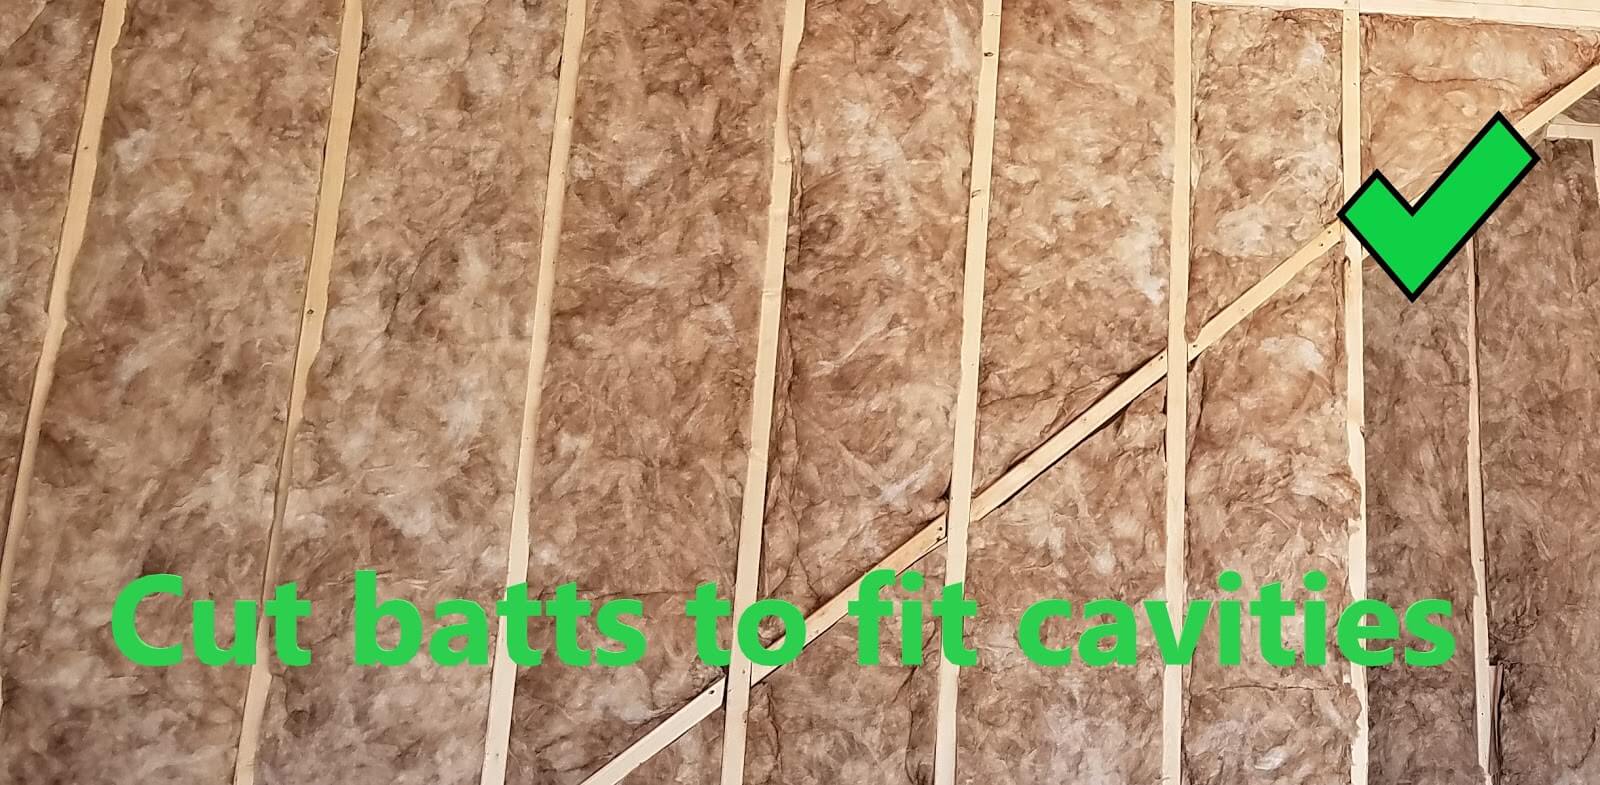
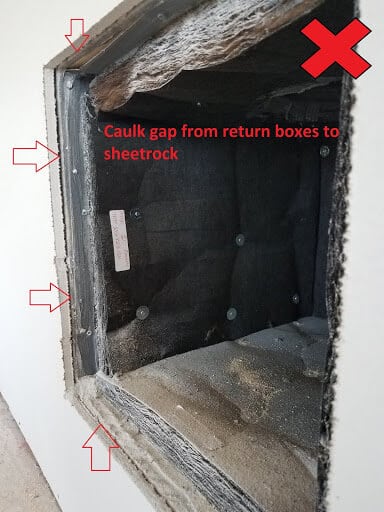
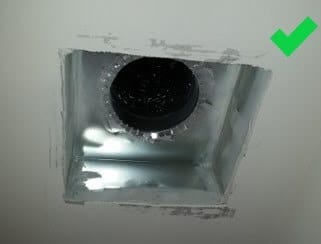
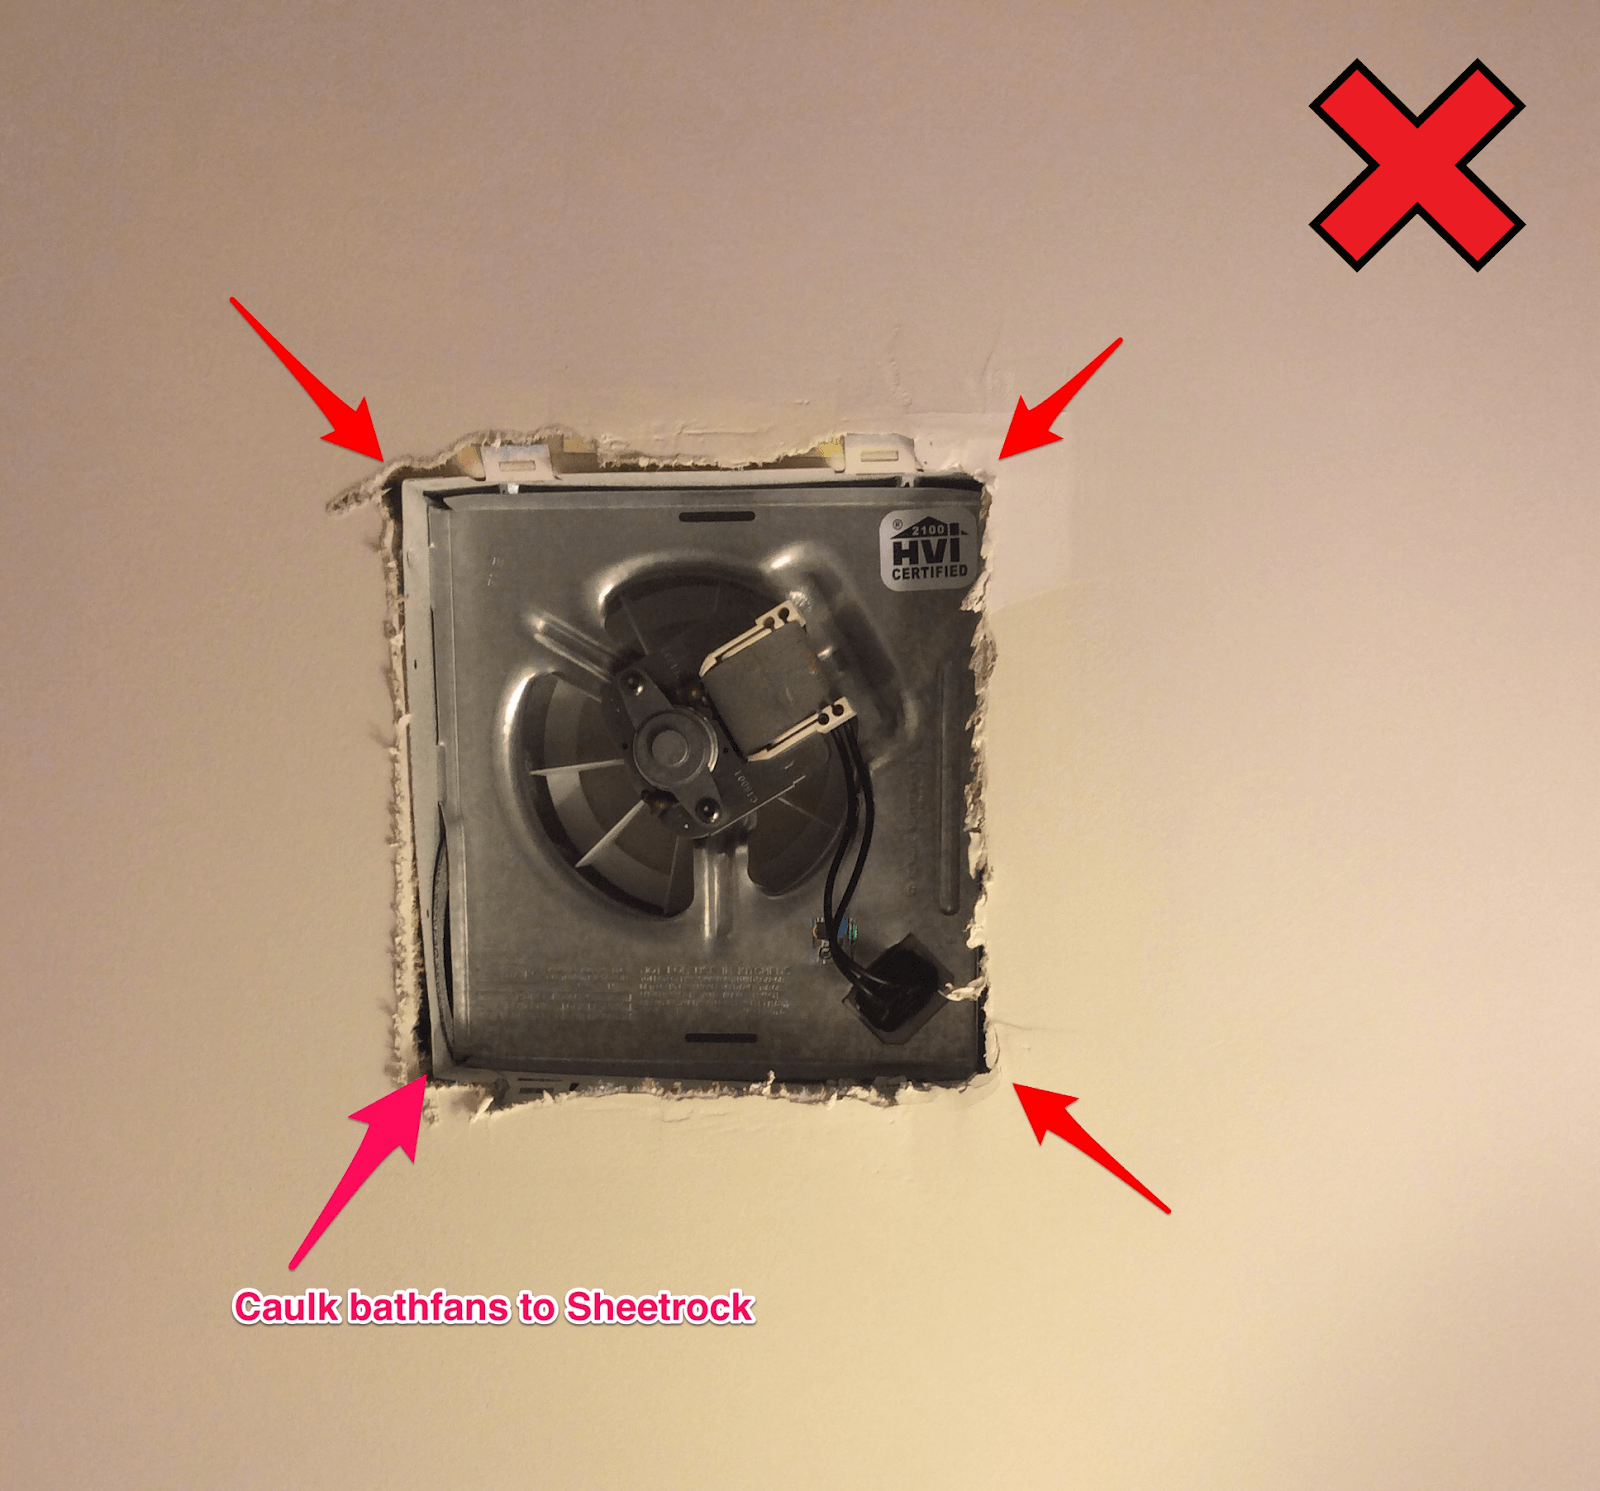
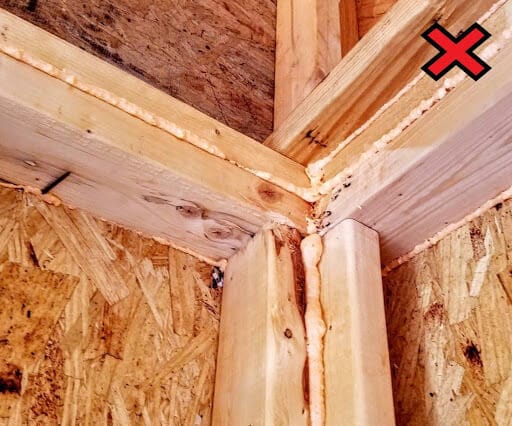
Have you ever heard that building an energy efficient house is too expensive? We sure have! So, here’s our guide to prove this old school notion isn’t true. With ever evolving energy codes, it might be easier than you think to accomplish an efficient build even if you’re not exclusively on a mission to build eco friendly houses or a green certified building. A lot of energy efficiency home improvements boil down to the quality of the work your trades are doing (and what they’re not doing). You don’t need to recreate the wheel to implement sustainable building practices that are better for your buyers — and you!

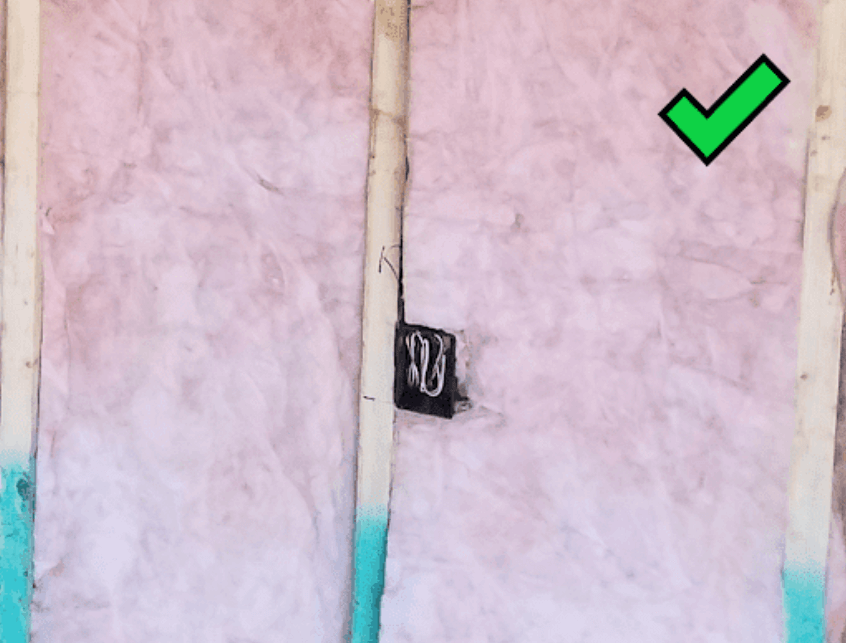
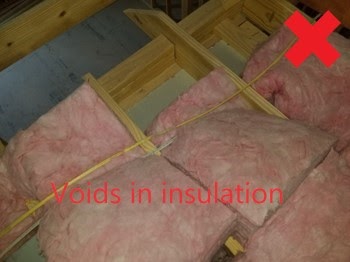
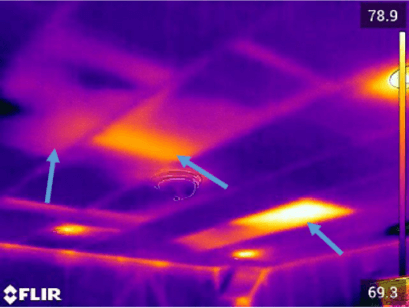
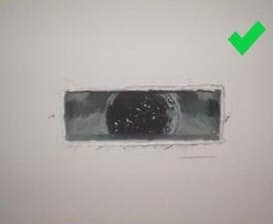
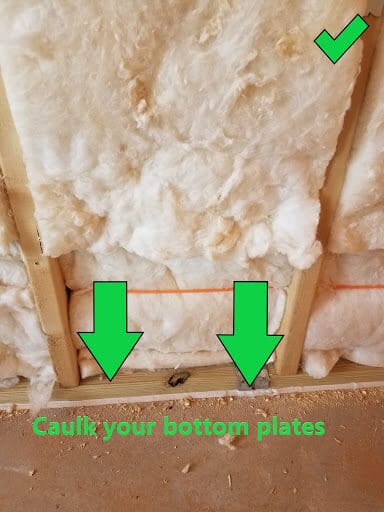
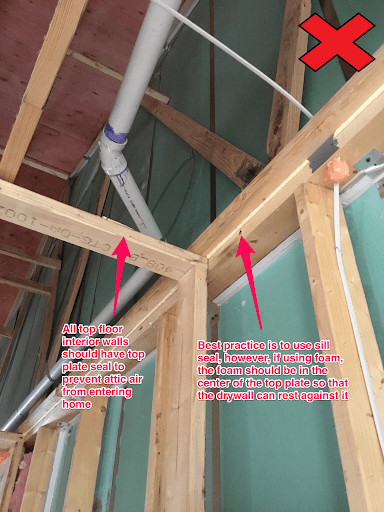
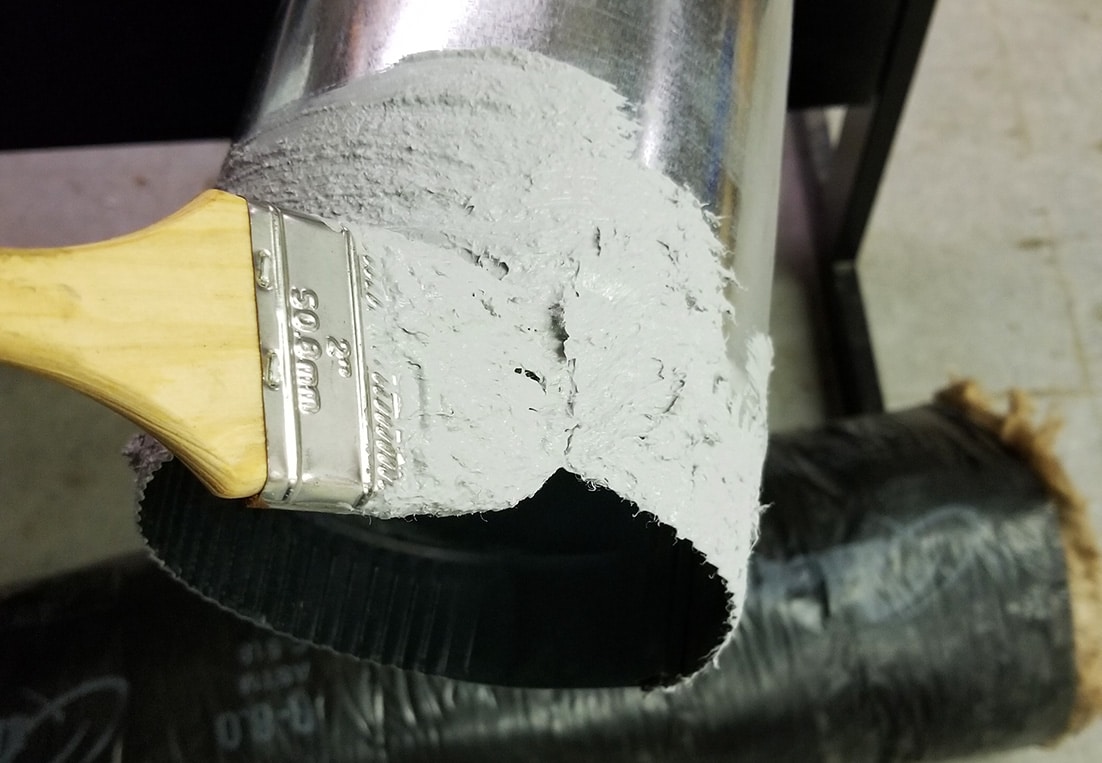
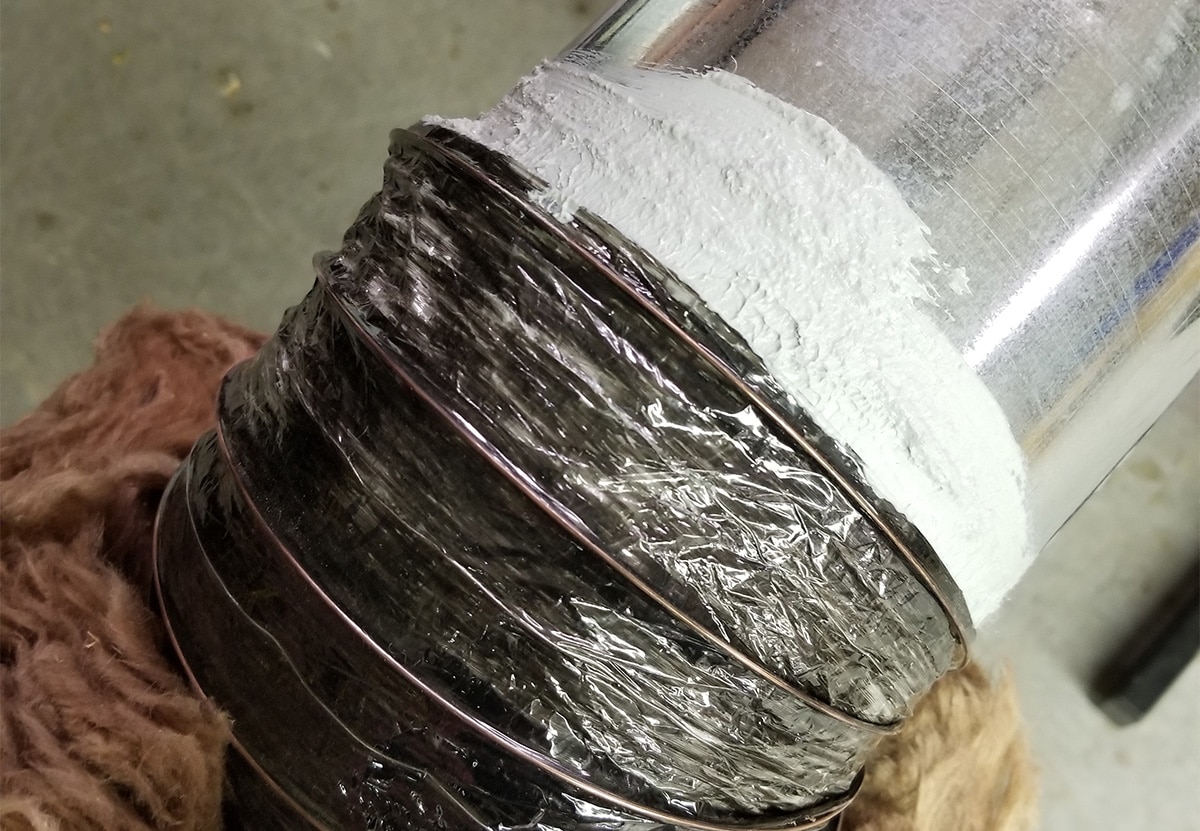
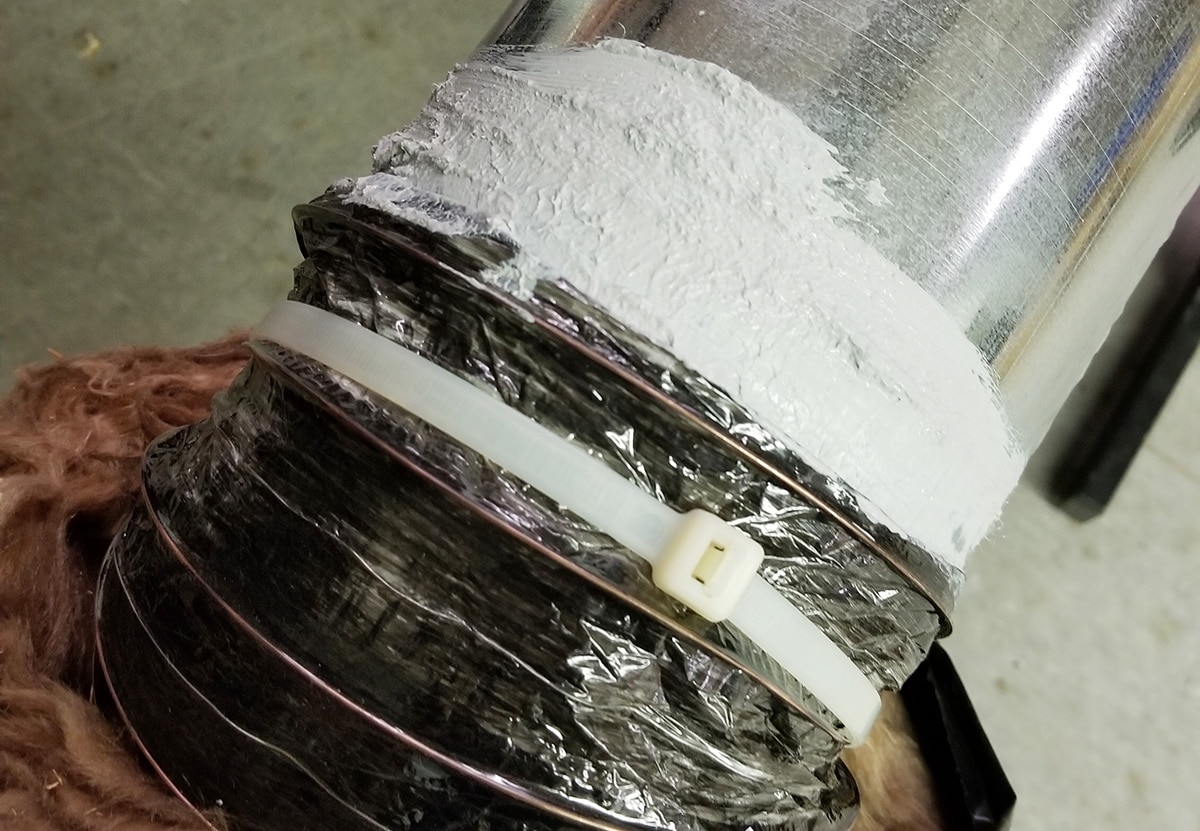
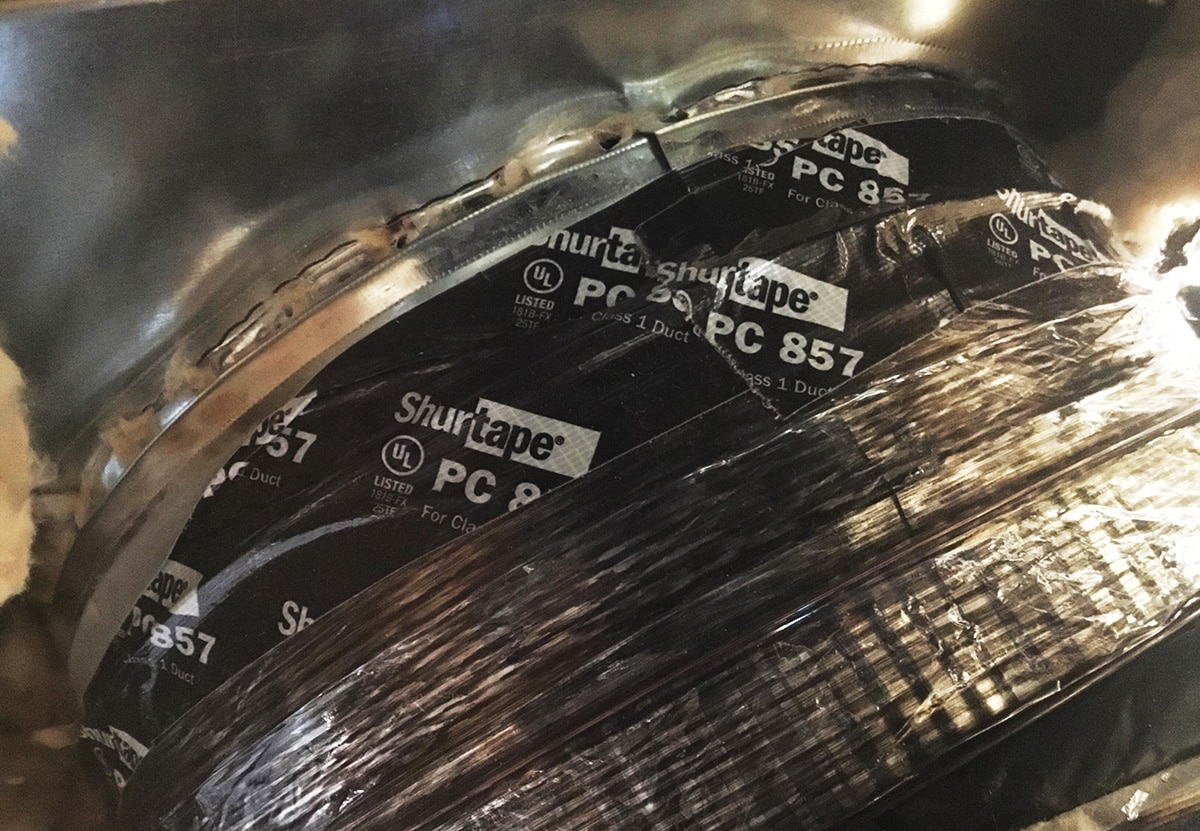
Below is your field guide to the top 5 low to no cost ways to improve your homes’ performance, or what we like to call the “low hanging fruit”. 

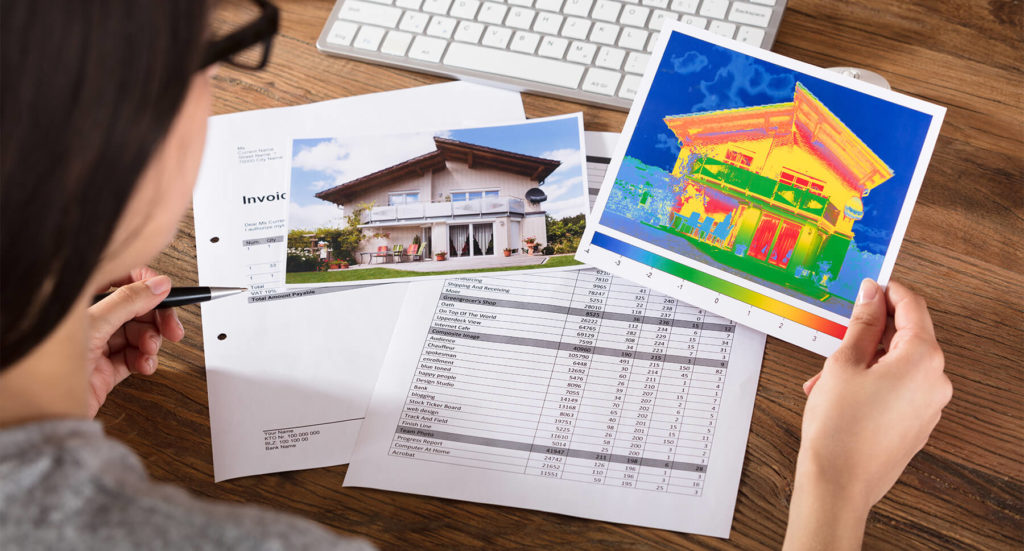
If you’re already a high-performance builder who’s looking for low cost strategies to improve your product, capture more utility rebates, or reduce warranty calls you should keep reading too! 

1. Implement Grade 1 Insulation

The quality of your insulation install is critical for a better thermal envelope & overall comfort. Getting this right is literally a no cost way to improve your homes’ performance and is an easy first step to energy efficient building. All it takes is your insulation contractor knowing how to achieve Grade 1 insulation and executing on the install. What do we mean by Grade 1? The examples below will paint a better picture for you.

Split the Fiberglass Batts Around Electrical, Plumbing, and Termite Lines

Batts split like in the two pictures below, ensure your insulation is doing its job, making contact with the surfaces it’s intended to insulate, and filling the entire wall cavity. (Click on each picture to zoom in.)

Batts installed like the below leave an air gap in the exterior walls, leading to hot and cold spots in your thermal envelope.

Here are a few more examples of incorrect vs correct batt installations. Can you guess which is good and which is bad? 

“Fluff it don't stuff it!” aka Avoid Compression

Compressed batts reduce the R-Value/thermal resistance, meaning the insulation is not performing to its full potential. Cut batts to fit the wall cavity & avoid compressions. Just like any other product in a home, we want insulation to be installed correctly so it can do its job!

Avoid stuffing the insulation around receptacles. Cut those batts to fit around electrical outlets. 

Avoid Gaps in Insulation

Having voids in your insulation can lead to thermal images that look like the picture below.  No bueno. 

If your insulation is looking like some of these bad practice pictures above, it might be time to schedule a free insulation training hosted by Southern Energy Management!  We’ll come out to your job sites and teach your insulation contractors best practices for a high-performance thermal envelope. 

2. Caulk Boots & Returns to the Sheetrock Connection

Although it’s written into the code book, this detail often gets overlooked.  It’s usually in the painter’s scope of work, and if you’re failing your duct test, this is the first thing to check.  Caulking the gap from your supply boots & return boxes to the sheetrock is the easiest, low cost way to improve your duct leakage results. 

Caulking these connections can dramatically reduce the leakage in your HVAC system.  It helps ensure the heated and cooled air is making it to its intended destination and not escaping into the attic or walls. Bonus points- you’ll have a much better chance at passing your duct leakage test for code!

Pro Tip

Caulk your bath fans and can lights to the sheetrock too! Sealing this connection not only helps the bath fan remove more moisture from the air, it also improves your blower door test.

3. Avoid Foam on Top & Bottom Plates

Foam is commonly used to seal top & bottom plates. However, it runs the risk of being disturbed by trades who come in after it is applied. Making it the least effective way to air seal your envelope.

Top Plates

What do you think happens to a bead of foam when the sheetrock crew comes in? The foam bead gets ripped off when the boards are slid into place, effectively leaving zero top plate seal and allowing attic air to enter your wall cavities.

Bottom Plates

What about the bottom plates? Sheetrock crews & flooring installers don’t like when foam gets in the way.  Foam getting ripped away from the bottom plate leaves a partial air seal, leading to leaks and drafts.  Caulk is a great alternative with less risk of being disturbed after applied. 

4. Establish a Top Plate Gasket Strategy

Now that we’ve established that foam is not the best way to seal your top plates (and bottom plates), what are some other low cost, effective strategies?  We wrote an entire blog on this topic, but I’ll share a few methods below. 

Sill Seal Gasket

Sill seal is a great solution for interior/exterior top plates to avoid attic air entering your wall cavities. 

Pro Tip

Did you notice the sill seal extends to the interior top plates?  Interior top plates are just as important as exterior top plates. Installers commonly only install top plate gaskets on exterior walls.  The Interior walls account for as much as 70% of all gaps between the drywall and top plates.  

Alternative Foam Products

If you want to stick with foam as your air sealing strategy, maybe it’s time to consider the next generation of foam products — like Great Stuff Drywall Gasket. (We’re not paid to talk about this product, we just think it’s great stuff!) This foam has elastic properties that make it less likely to obstruct the sheetrock — Meaning it’s less likely to be removed or ripped out, while still creating a strong seal.

Caulk

Caulk is one of the most cost effective ways to seal top plates, the material is cheap and readily available.  However, it can be one of the most challenging to enforce/verify in the field. 

It’s very common to see caulk (and foam) applied in between the 2 top plates.  This is not an effective strategy. The goal isn’t to seal the two top plates together, it is to create a seal between your attic and conditioned space.  Caulk applied to the center of the 2nd top plate ensures the sheetrock is making contact and forming a strong seal.  

Example of proper application of caulk as a Top Plate Gasket strategy

If your insulation contractor is struggling to maintain air sealing quality within your production schedule, ask us about our air sealing services.  We’ll fix the areas they missed and keep you from losing days off your schedule from coordinating corrections.  This has been extremely valuable for our builder partners in helping improve their blower door results while keeping the project on track.

5. Prevent Duct Leakage

Leaky HVAC systems can be a headache for the homeowner and the builder. Avoid duct testing failures and homeowner comfort callbacks with these pro tips. This shouldn’t be expensive. Remember… a bucket of mastic and knowing best practices makes a big difference.

Bucket of mastic next to roll of duct tape

Mastic

Passing duct tests will be a lot easier if you’re using the right materials. Under the new NCECC requirements, using a water-based duct mastic on ALL connections is essential for success. While messy at times, mastic is an inexpensive solution that is suitable for almost all surfaces. It can even fill the tiniest of gaps and dries like cement. We recommend “painting” the mastic onto connections up to 1/4 inch thick using a chip brush. 

With that in mind, tape is also worth a mention. We don’t recommend exclusively using tape to air seal ductwork since it does not adhere well to all surfaces (especially dirty ones). Tape also cannot seal all of those tiny holes the way mastic can, specifically the small gaps where duct collars are tabbed into the plenum or split. 

Flex Duct to Collar

Remember, mastic should be applied generously on the metal duct collar BEFORE sliding the flex duct in place. Taking the time to create this super strong seal between the flex duct and metal collar is well worth it.

Collar to Plenum (Metal to Metal) Connection

When fastening collars to a plenum or box, the tabs most commonly used in this process leave lots of tiny triangular holes. These holes can add up fast! After the collars are installed, seal the edge where the collar meets the plenum with a generous helping of mastic. You should notice a vast reduction in duct leakage, especially since several of these connections are in the attic or crawlspace.

For more information on HVAC best practices, check out our sister blogs, wrap your ducts tighter & HVAC design for mixed-humid climates.

What's Next?

Hopefully by now you’ve taken away a few easy to implement, low cost strategies on improving your homes’ performance to deliver a better product! Remember, you don’t need to specialize in green home construction to build a more efficient home.  One advantage to hiring a 3rd party energy rater is quality assurance and holding trades accountable.  Take the guesswork out of how leaky your house is and gain control over your home’s performance, all while protecting your brand and elevating your business to the top of the market. 

If you’re interested in learning more of the “less sexy” but equally important details, check out our upcoming Continuing Ed Courses,  schedule a free onsite training session, or ask us about our air sealing services.  

Building Science Guide

Best Practices for High-Performance Homes
Free PDF

Ready to Get Started?

Schedule a meeting with us today to review your home performance goals and challenges.