Properly installed wall top gasket (sill seal) in a hallway beneath attic

Air Sealing Part 1

The Hidden Value of Wall Top Air Sealing

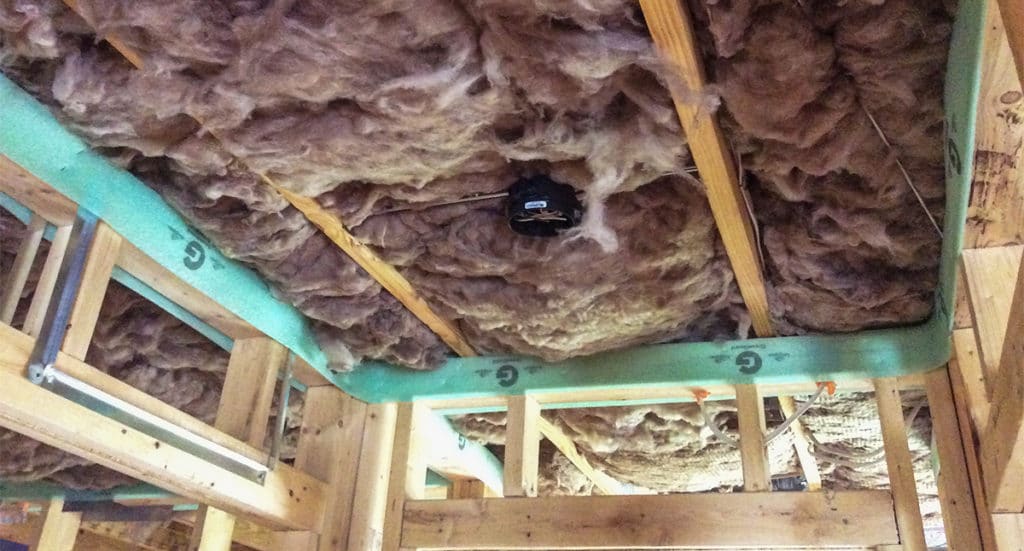
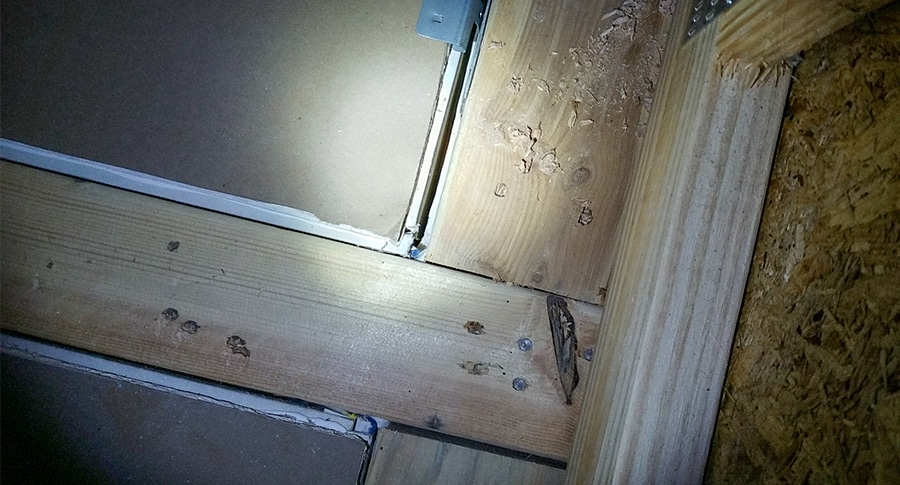
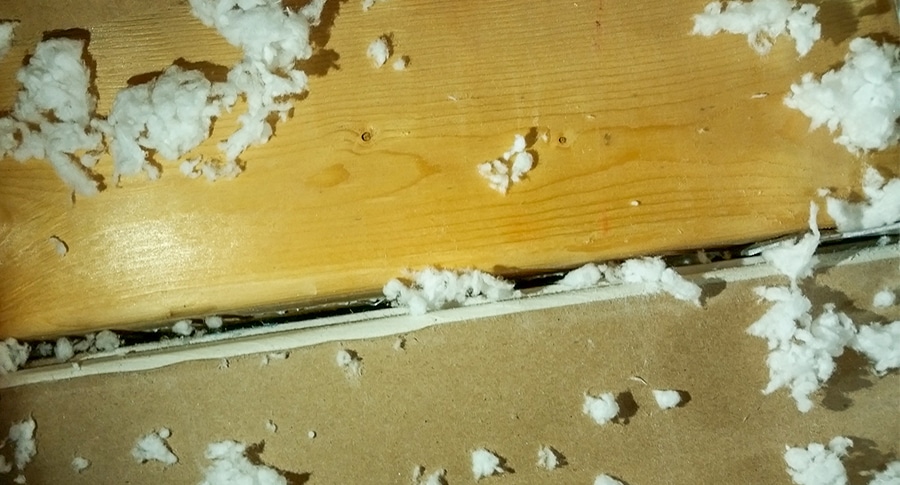
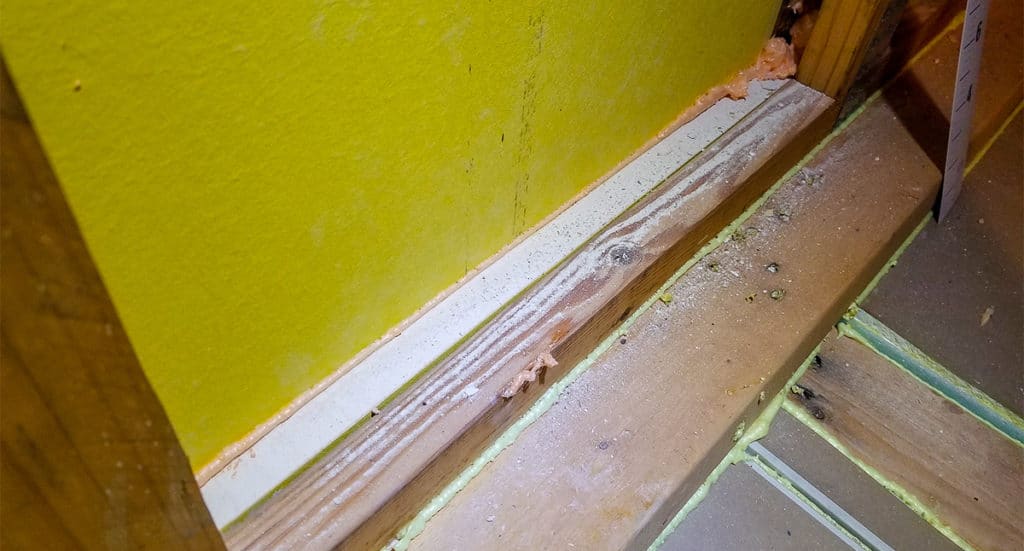
Almost every project has some opportunity for wall top air sealing. Anytime there are walls below an attic, there are unsealed gaps where the drywall meets the top plate.  Although these gaps are relatively small, say between 1/16 and 1/8 of an inch, they add up very quickly. Exterior walls are not the only area to be concerned with. The main symptom of unsealed or poorly sealed wall tops, is air leakage along receptacles and base boards of interior walls — and interior walls generally count double since both sides are finished and exposed to the attic. If you add all of the linear feet of exterior AND interior walls below the attic, you may easily have a 1/8″ gap in your building envelope that is several hundred feet long. That’s essentially an open window!  

Close the door, you're letting the heat out gif

Why is Air Sealing Important?

Air sealing the drywall to top plates is required by many of the efficiency certificate programs that SEM offers, such as ecoSelect and Energy Star.  Beyond meeting certificate requirements, air sealing should also be considered a low hanging fruit on any residential construction project. Through proper air sealing techniques, you should expect a high return of performance on your investment and, when this is done correctly, a substantially lower blower door test or Air Changes per Hour (ACH50).  For many builders, an effective (or more effective) wall top strategy may help achieve tight blower door requirements for rebate programs like Duke Energy-Progress’ HERO Code. Let’s take a moment to look at several of the most common wall top air sealing strategies along with their pro’s and con’s.

Unsealed drywall observed during failed final inspections.

Tips, Tricks, & Techniques for Wall Top Air Sealing

Now that we have identified the opportunity for air sealing at wall tops between drywall and top plate framing, let’s look at the most viable strategies for closing these gaps.

1. Sill Seal Gasket

A Sill Seal Gasket is secured to the top plate pre-drywall with staples. This provides a secure seal between the wallboard and the top plate. This is one of the most common strategies that we see in the field, and it has some benefits as well as weaknesses. This is an ideal solution for high volume builders who rely on 3rd party verification of air sealing details.

Pros

The relatively low cost of material and availability make this a desirable solution for many builders. Since the gasket is visible during the framing and insulation inspection, HERS raters are able to verify completeness and quality of installation.

Cons

The quality of the installation is extremely important.  The material is somewhat stiff and needs to be neat and flat to reduce the possibility that drywall installers may remove the gasket.  Avoid excessive overlapping, rounded corners, or excessive (loose) material which may obstruct the drywall during installation. 

Properly installed wall top gasket (sill seal) in a hallway beneath attic
Partially Removed wall top gasket found in the attic

Properly installed wall top gasket (sill seal) in a hallway beneath attic. Unfortunately, partially removed wall top gasket found in the attic is common.

2. Next Generation Foam Sealant

Products like Great Stuff Pro Drywall Gasket provide a relatively new option for effective wall top air sealing. We first saw this product in 2018, and it is specifically formulated to form an airtight gasket between the drywall and top plate. This product will be one to watch in 2019. The foam gasket should be installed along the vertical edge of the top plate, in the same fashion as sill seal. This is another great solution for high volume and production builders who rely on their inspectors for verification. Normal expanding window and door type foam sealant is NOT appropriate in this application.

Pros

Foam is more forgiving during install since the soft elastic properties are less likely to obstruct the drywall. These products are less likely to be removed, while still creating a strong seal at the wall top to drywall interface.

Cons

This material can be expensive and may not be readily available at the time of this blog. Seasonal weather conditions can also be a challenge. High humidity during summer months in the South East can delay curing time, which may prevent this foam from expanding to its full potential.

The top bead is too thick and may obstruct drywall, the bottom bead is too thin and may not seal large gaps, but the middle bead is just right at 1/8-1/2″ cured thickness.

3. Foam Seal Wall Tops After Drywall

“Walking” the attic after drywall is installed and sealing all of the cracks with polyurethane foam is a durable and effective way to seal up your drywall. This is the appropriate application for your general purpose expanding foam. This strategy is recommended for small and custom builders who need an extremely tight building envelope and have the manpower to get it done.

Pros

This is an extremely durable and effective strategy with almost no chance of the seal being damaged by trades. This is also the only strategy that can be used to improve wall top air sealing in the event of a failure at final inspection. You may even find some other opportunities for air sealing while you are up there.

Cons

Any builder can get great results from post drywall air sealing, but this strategy may not be for everyone. This technique may be logistically challenging for builders on a tight production schedule.

Foam seal used to fill wall tops after drywall
Rater foam sealing wall top in attic full of insulation

Pro tip: Take my word, foam seal wall tops before insulation is installed!

4. Caulk

Using a drywall adhesive caulk at the time of installation can be an extremely effective strategy. Since the wall boards are basically “glued” to the wood top plate, an extremely tight seal can be achieved. This strategy should be effective for any builder, but quality control can be a challenge. With this in mind, this strategy is most likely to be effective for smaller or custom builders who have tighter control and supervision over their contractors.

Pros

This is one of the most cost effective ways to seal wall tops, while the material is cheap and readily available.  

Cons

The most difficult air sealing strategy to inspect and verify.  Requires close on-site supervision to ensure that wall tops are completely sealed. 

What's Next?

Wrap up and contact your account managers at SEM to see which strategy is best for you!

Ready to Get Started?

Schedule a meeting to review your home performance goals and challenges.