Top 5 Air Sealing Strategies for Townhome Party Walls

Ulysses, building science technician at southern energy management, spots a gap to daylight that needs air sealing attention

Topics in This Article

It's Time to Talk Party Wall Air Sealing

As builders look for opportunities to increase density and provide affordable housing solutions, townhomes are becoming an increasingly popular product choice. In fact, single family attached homes now account for approximately 20% of all new construction according to Zonda. Given the growing market share these attached units represent, we thought it a great time to deep dive into one of the most misunderstood and challenging details encountered in new construction: The townhome party wall! 

Before We Get Started...

This party wall detail can really up the ante when it comes to air sealing, and often challenges even the most seasoned builders. Before we dive into specific strategies to seal the party wall, let’s dispel some common myths and misunderstandings:

Celebrating at the office

Addressing the Core Issue

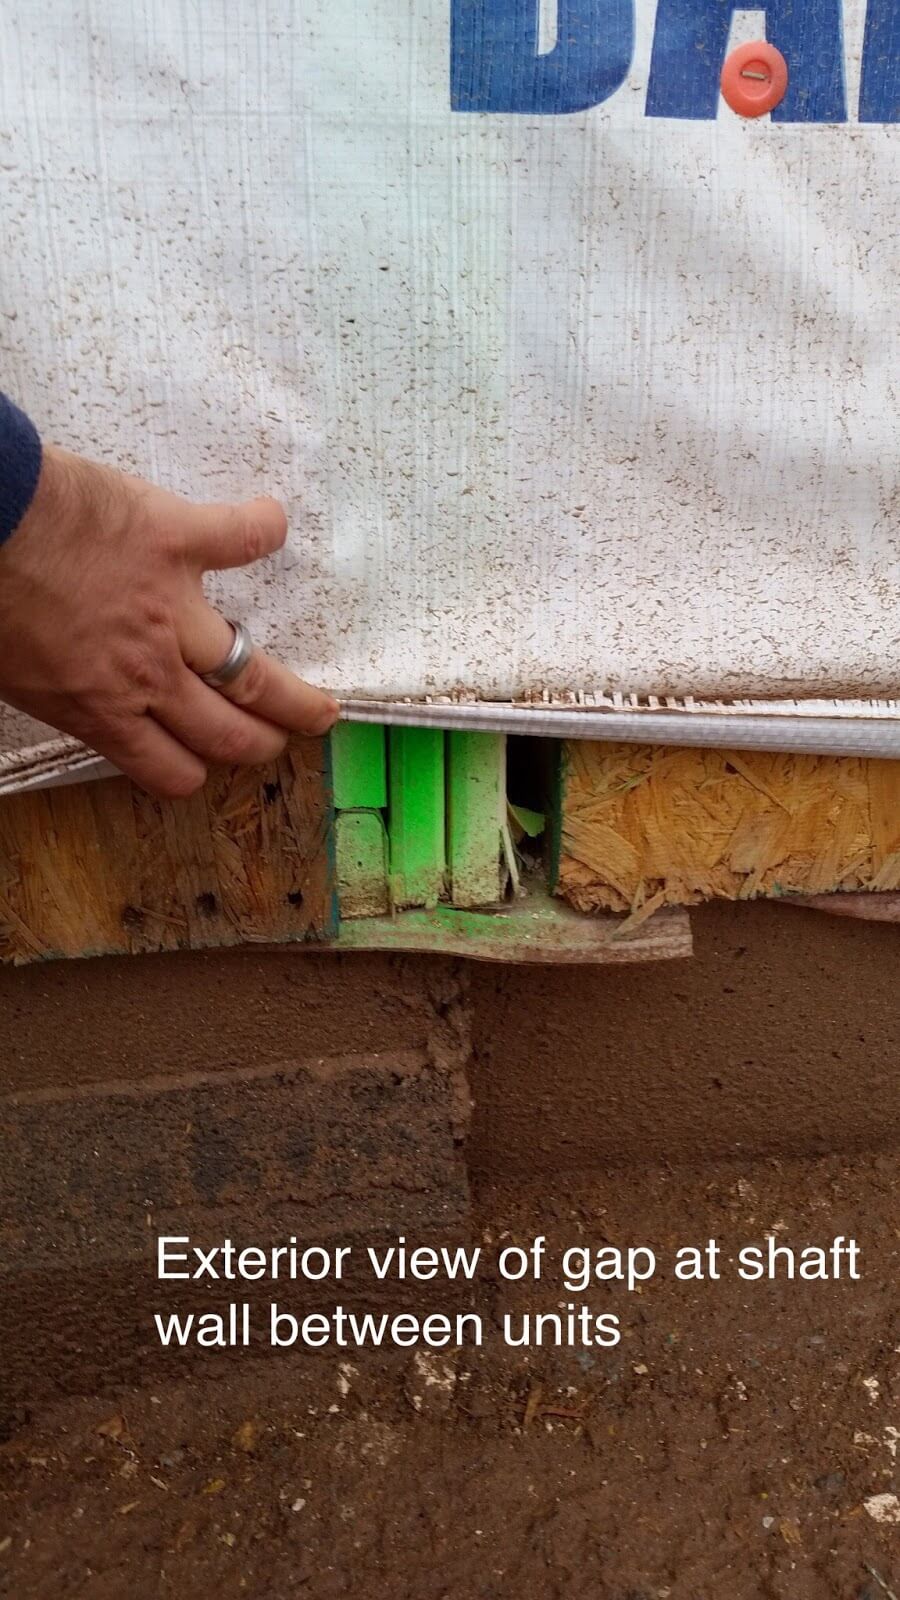
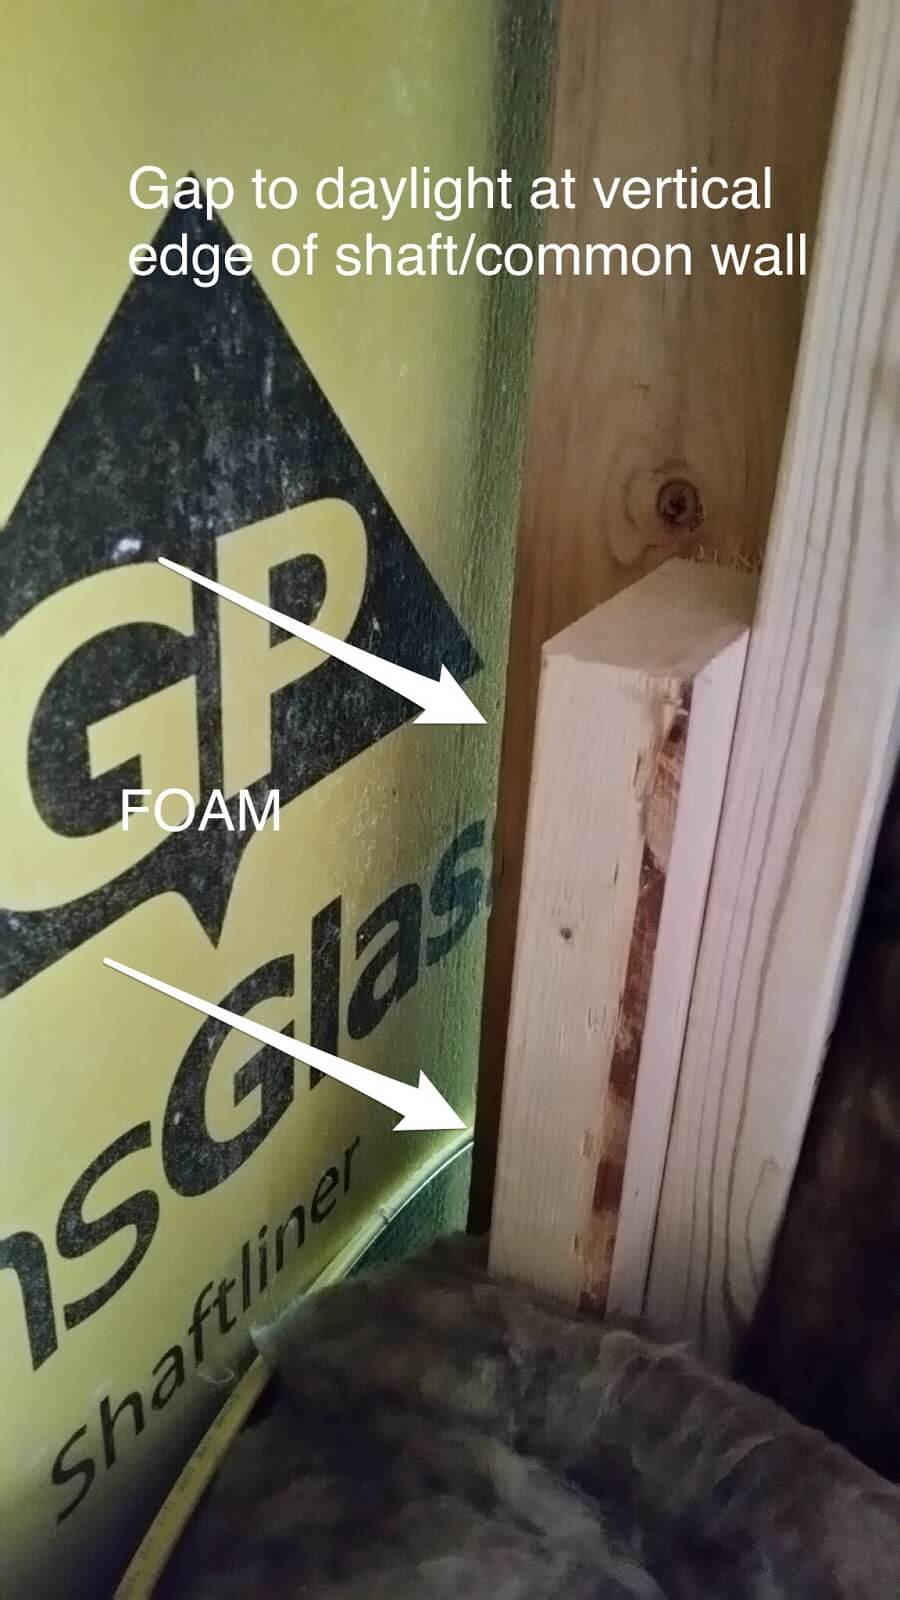
Some may assume that because the party wall simply separates conditioned space from conditioned space that controlling air leakage there is inconsequential. However, having conditioned space opposite the party wall does impact the overall load of the home, so it’s critical that we control air leakage here to ensure the long term comfort and efficiency of both units sharing the wall. A good starting point is to simply imagine this party wall is an exterior wall.

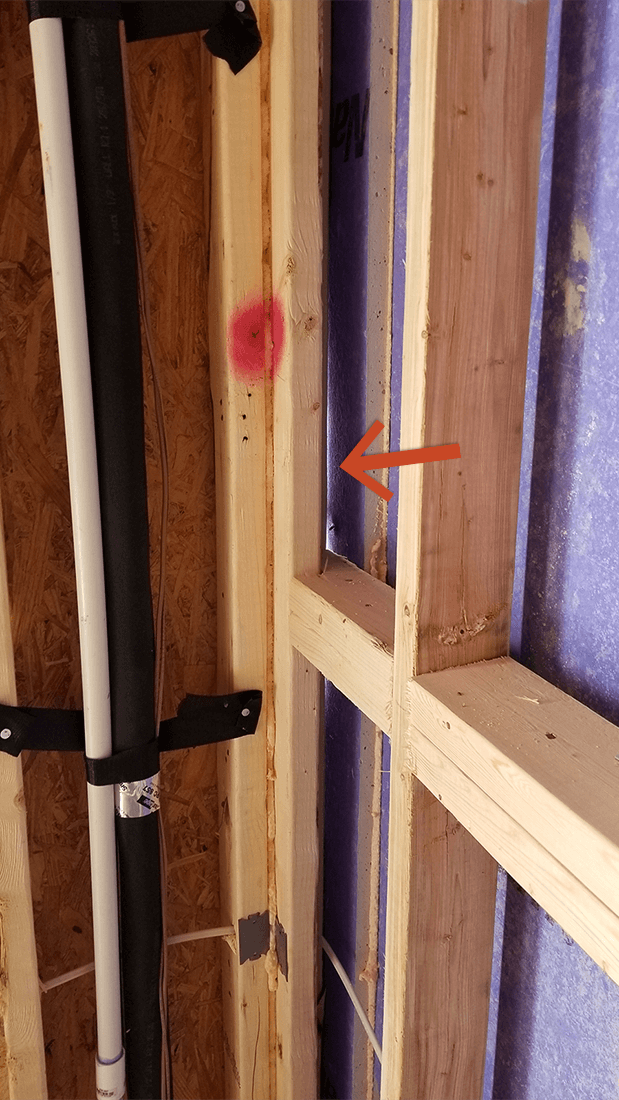
Others may assume that because they have specific strategies in place to address air leakage at penetrations in the sheetrock (i.e sealing electrical outlets, switch plates, etc), they do not need to address the areas behind the wall. Sealing penetrations in the sheetrock can at times be a helpful last resort to improve performance, but as a primary line of defense this strategy fails to address the core issue — The air leakage inside of the wall assembly itself. 

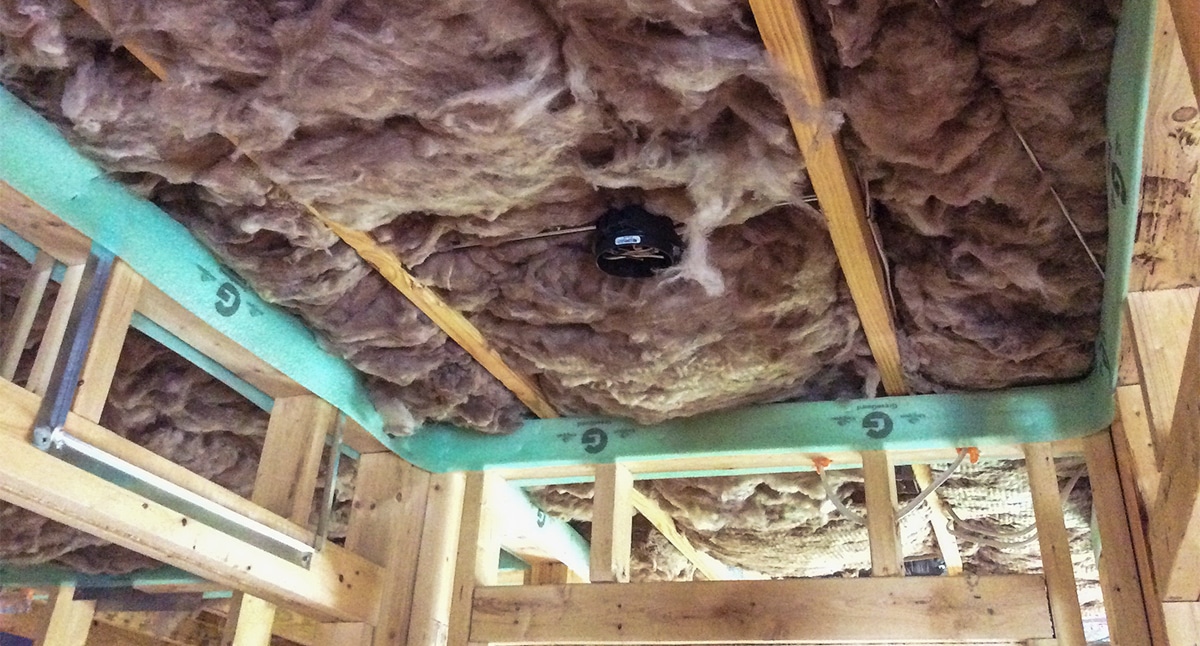
In addition to not addressing the core problem, spot treating air leakage at drywall penetrations can lead to unintended and pesky comfort issues by moving that leakage to other areas in the home. This can be particularly problematic in homes with webbed floor trusses which allow air to move freely throughout the home once it reaches the floor system. Controlling air from entering the wall assembly should always be the goal. This is true for all wall assemblies!

Air Sealing & Navigating Code Requirements

Another unique challenge we face with party wall air sealing is navigating the complexities of fire code. These code requirements do create challenges but none that cannot be overcome through careful attention to detail. There seems to be variance from municipality to municipality as to what products or strategies they will allow — Particularly with regards to fire caulk vs fire foam. All the strategies outlined below have been successfully implemented in our markets, but always be sure to consult with your HERS rater and local code officials to ensure compliance. We never want to compromise safety for efficiency or comfort.

Now that we’re all on the same page and have the disclaimers out of the way, let’s dive into the top 5 most impactful air sealing strategies to ensure townhome performance.

1. Vertical Fire Break at Exterior Walls

Best Practice: Vertical DensGlass spacer with vertical edges 100% air sealed

Fire code often dictates that there is a vertical fire break on either side of the shaft wall running from the foundation all the way to the attic. This is one of the largest and most often overlooked sources of air leakage we see in townhomes. The core reason this is missed may very well be a logistical one — Many times this detail is covered with house wrap before the air sealing has been completed and is easily overlooked.

Remember, in most cases housewrap is intended as a moisture control layer, not an air barrier and therefore doesn’t sufficiently address this source of leakage. Sealing from the interior can be done but tight spaces can make a complete seal challenging at best and nearly impossible at worst. Sealing from the outside with a code compliant sealant before housewrap installation will provide a better seal with far less frustration.

2. Vertical Fire Break at Band Joists ​

Best Practice: Vertical DensGlass spacer with vertical edges 100% air sealed

Since the vertical fire break generally extends from the foundation all the way up to the roof, the exterior corners of the band joist require extra attention to detail. The same gap is present at the vertical edge of the band joist, as the wall section below. In addition to being covered by house wrap and insulation which can conceal the daylight shining through this opening; the band is above the line of sight, and sometimes out of sight means out of mind.

These (relatively) small gaps at the band joist add up quickly. The total leakage area of the vertical gaps at the band joist alone can easily add up to an opening that is ½ a square foot. In a floor system with webbed trusses air leakage form the band joist can easily move horizontally, making air leakage very difficult to pinpoint and correct after drywall.

Missing air sealing at vertical fire break at band joists

3. Wall Tops - DensGlass Spacer ​

Best Practice: Both horizontal edges of the spacer air sealed with approved fire caulk or foam

The air space between the framed interior wall and the fire rated core wall often extends from the foundation all the way to the attic. A narrow strip of DensGlass is most commonly used to fill the horizontal gap behind the top plates. We have two sides (gaps) surrounding the DensGlass spacer along top plates that will be critical to seal. This detail is of the utmost importance along the top plates adjacent to unconditioned space to ensure there isn’t a chase to the attic. Sealing the edges of the DensGlass spacer each floor of the house helps with compartmentalization which we’ll break down further in it’s own section.

4. Wall Top and Bottom Plates

Best Practice: Use sill seal or caulk between the subfloor and bottom plate; Use sill seal or gasket foam, or wet caulk between drywall and top plates beneath the attic or unconditioned space.

Air sealing the top and bottom plates of the wall should not be ignored. Just as in detached housing, there can be a significant amount of air leakage at the gap between drywall and the vertical edge of the top plate. This should only be necessary on walls that are directly beneath unconditioned or attic space, as long as the corners and band joist are well sealed. We have covered this topic in a previous blog, which can be found here. There are several effective options for wall top air sealing: foam gasket (sill seal), expanding drywall gasket foam, or a heavy bead of wet caulk at install 

Just like other exterior walls, bottom plate air leakage should be controlled through a combination of sill-seal gasket and/or caulk between the bottom plate and subfloor. Remember when we said you should consider the party wall as an exterior wall? Don’t forget to implement the sill-seal and bottom plate caulking you typically would!

Properly installed wall top gasket (sill seal) in a hallway beneath attic

5. Compartmentalization

Best Practice: Use sill seal or caulk between the subfloor and bottom plate; Use sill seal or gasket foam, or wet caulk between drywall and top plates beneath the attic or unconditioned space.

Once we’ve sufficiently addressed the exposed perimeter sides of our party wall, we can move our focus to layers of redundancy. Fire code usually requires a vertical fire break every 8 feet within the wall itself — This is a great opportunity to compartmentalize! When we talk about compartmentalization, we’re trying to break that wall assembly into much smaller sections as a way to CYA. If by chance, we’ve missed any air sealing details, we can contain that leakage to a much smaller section of the home/wall when we’ve sufficiently compartmentalized it. Sealing both sides of the DensGlass firebreak to the framing will help us accomplish this goal. 

What's Next?

Hopefully this breakdown helps to shed some light on the complexities of the townhome party wall. Following the steps outlined above will empower you to take control of your next townhome project! Remember, fire foam and fire caulk are your friends and, whenever possible, adding layers of redundancy will help ensure a high performance wall assembly. Feel free to reach out with any questions or concerns about strategies specific to your next project. If you feel like you or your trade team could still use a little additional help, check out our air sealing service.

Building Science Guide

Best Practices for High-Performance Homes
Free PDF

Ready to Get Started?

Schedule a meeting with us today to review your home performance goals and challenges.